4 weeks till deadline:
WEEKEND OF THE 12/06/2021
I took a few more images, they were of my mum in the bath, as I wanted to get some strange images of her hands and feet. I chose my favourite ones and uploaded them. The image of my mum was taken by chance, as she was just making dinner, and I caught her like this with the onion. I did not like the images at the end of this small photoshoot, because I could not get the image I was imagining. I think this is because I was purposely trying to take specific images, whereas the image of my mum with the onion was a complete chance and I like this image, therefore again proving, that I work better with using a chance for my images, as I mentioned before.
I took a few more images, they were of my mum in the bath, as I wanted to get some strange images of her hands and feet. I chose my favourite ones and uploaded them. The image of my mum was taken by chance, as she was just making dinner, and I caught her like this with the onion. I did not like the images at the end of this small photoshoot, because I could not get the image I was imagining. I think this is because I was purposely trying to take specific images, whereas the image of my mum with the onion was a complete chance and I like this image, therefore again proving, that I work better with using a chance for my images, as I mentioned before.


14/06/2021
|
Another thing that I did this week was practice making a handmade photobook. I did this using paper and thread and I found a tutorial in a book. First of all, I folded all my pieces of paper in half, and then I used a small bit of scrap paper to measure the middle points, and then another two points on either side. This helped indicate where I needed to pierce holes into the bind of the book, as I turned to the middle of the book and pierced 3 holes. I then used thread to sew all the pages together, where the guide told me to go from the middle to one side, them to the other, back to the middle, and repeat. It was quite a quick and simple process. I want to try another type of stitching for bookbinding, to see what options there are and what I prefer. |
|


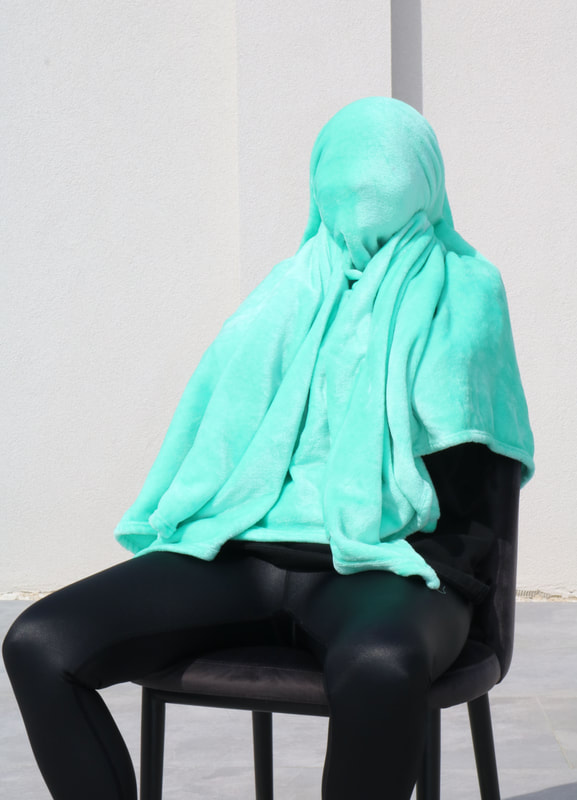
I then started to think about the images that I wanted to include in my phonebook. I started by choosing the overall favourite images that I have taken throughout this course. I then looked through my photoshoots and picked more images I like. I chose a few from my postcards from home photoshoots, mood board photoshoots, half-term photoshoots, etc. All my images have a relationship through the use of colour, and the humorous and unique subjects of the images. The main thing that I liked about my first choice of images was the mysterious atmosphere. I want my book to be questioned and the images to be questionable, like who is that, or why is this happening, as I want people to create a narrative themselves.


3 weeks till deadline-
23/06/2021
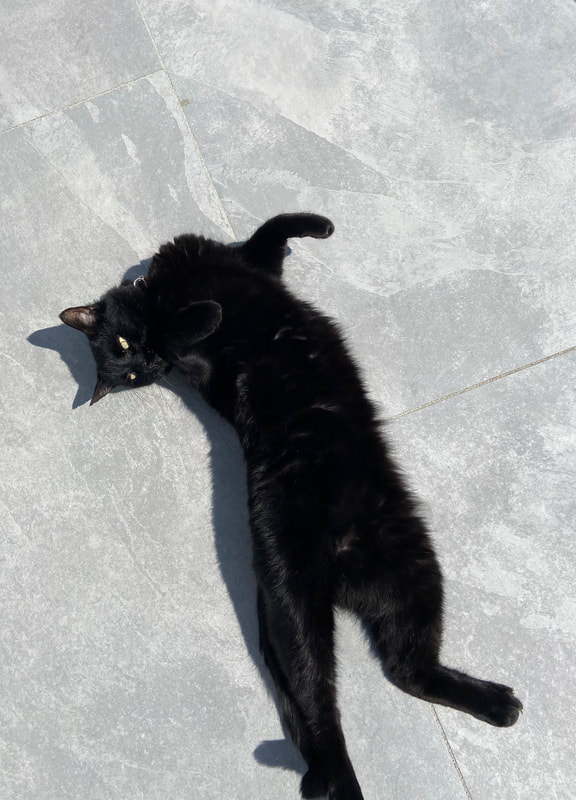
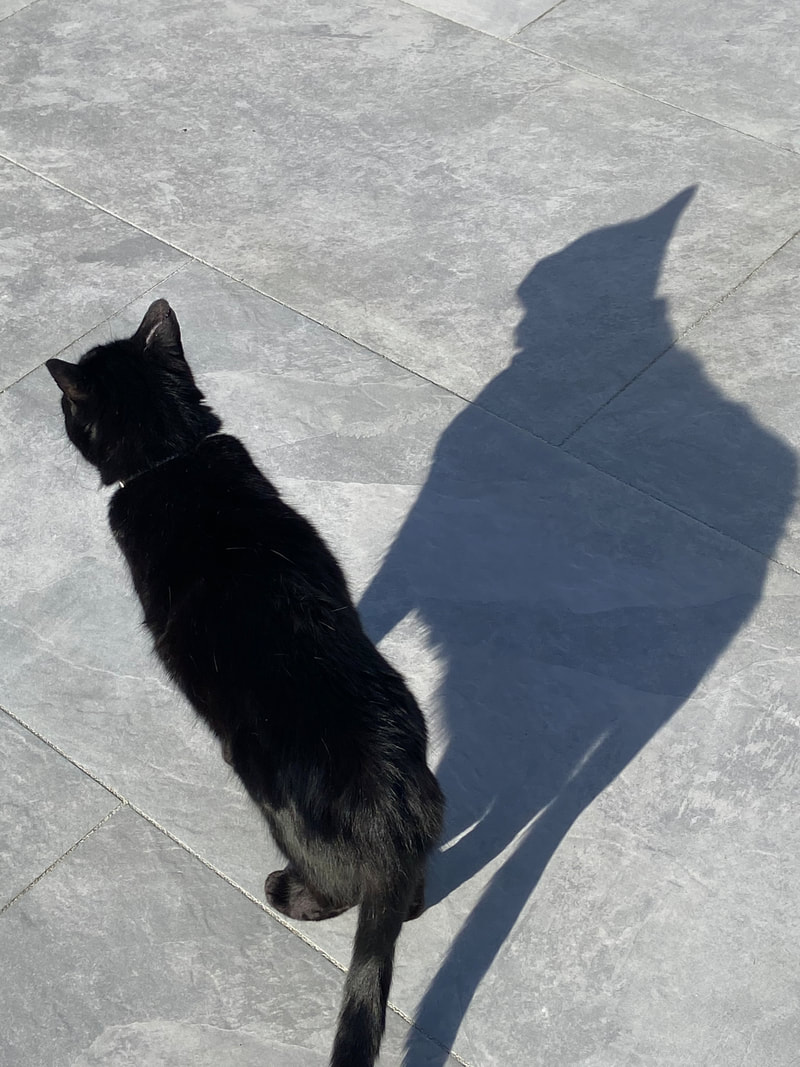
After placing all the images on the table, and looking at them as a collective, I decided to extract a few images, as they did not connect well as a group of photos. I also felt I had too many images with my cat, therefore getting rid of one. With the image of my mum, I felt it wasn't as interesting or structured, and sort of broke the theme for my ideas, this was the same with the image of my friend from the side, blowing. I also thought this image was too warm and not connect with the colours of the other images. I love the diptych of my mum and cat's arm, however, I will be binding my book by hand and it will be a portrait, therefore it would not work as well, and I will not be including any other diptych, therefore it will be odd in my selection. Sometimes in photography, you must let go of personal connection to images, for the success of your work.
After placing all the images on the table, and looking at them as a collective, I decided to extract a few images, as they did not connect well as a group of photos. I also felt I had too many images with my cat, therefore getting rid of one. With the image of my mum, I felt it wasn't as interesting or structured, and sort of broke the theme for my ideas, this was the same with the image of my friend from the side, blowing. I also thought this image was too warm and not connect with the colours of the other images. I love the diptych of my mum and cat's arm, however, I will be binding my book by hand and it will be a portrait, therefore it would not work as well, and I will not be including any other diptych, therefore it will be odd in my selection. Sometimes in photography, you must let go of personal connection to images, for the success of your work.

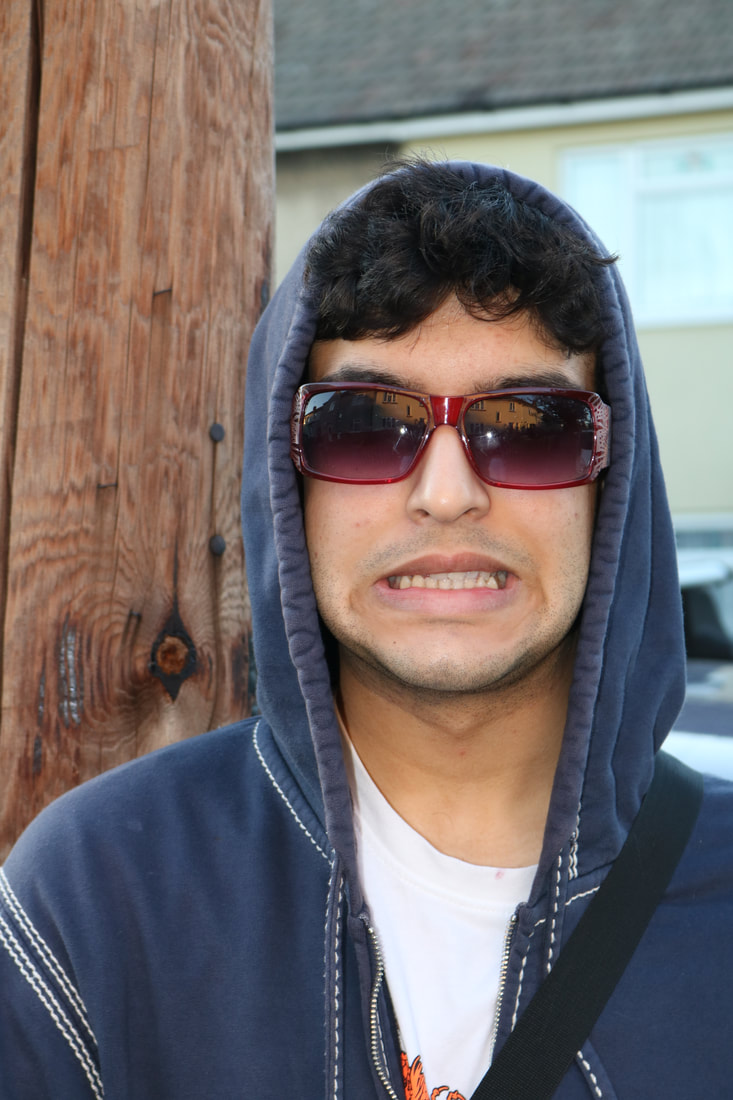
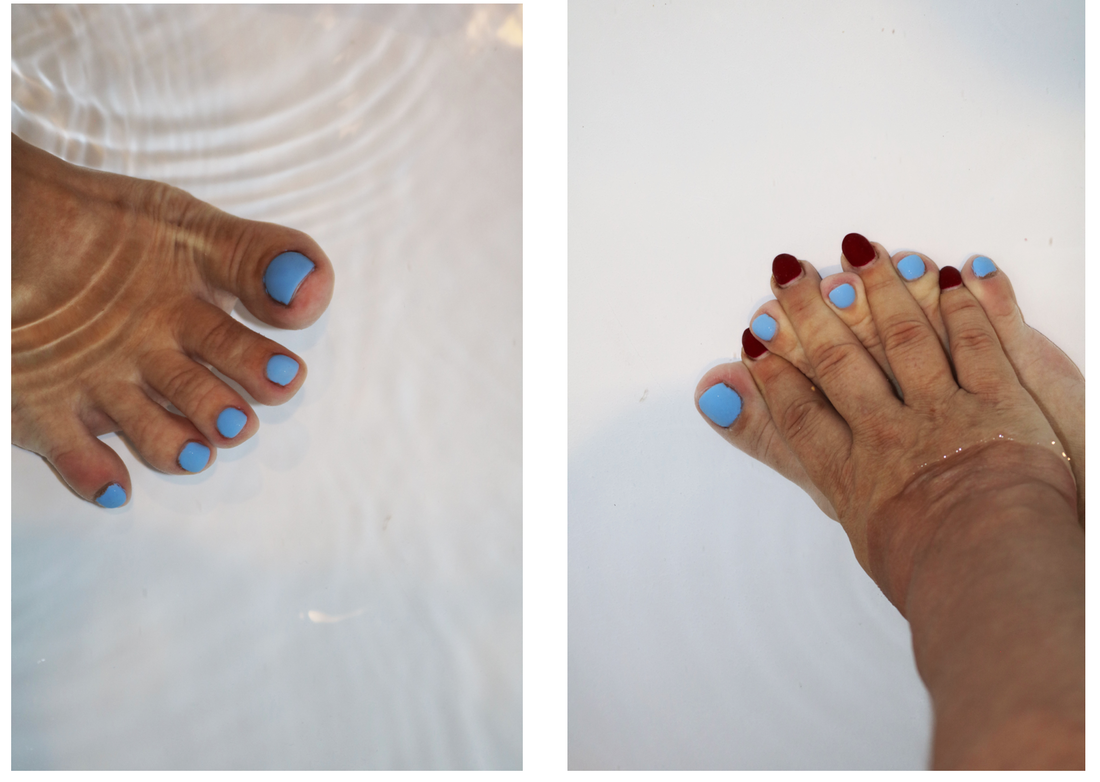
I also tried some sequencing of images, trying to look at pairings of my images. During this process, I found some things I wanted to fix, adapt, edit, with some of my images. With the image of my friend Zain, wearing the glasses, I decided I should crop it to be much closer, and also edit the reflection in the glasses to be a more saturated yellow, so that it pairs well with the image of the coffee. Another thing I want to try is flipping one of the images of my mum's foot, so that when it is paired with the other, it works better.


I was thinking about making the cover of my photobook, like a messy junk draw. I thought of an idea of using a lot of random items like gum packets, wrapper,cards, pens etc (stuff that would be found in a junk draw supposedly) and scan it in and make it look like a junk draw, bringing in some texture. I tried this out in lesson to just see the basis of my idea, visually, and also tried putting my hand in like someone is reaching for something in this 'draw'.


One issue that came with this was what could go in the scanner as it needed to be shut but did not want to break it with 3D objects. Also, 3D objects allow light going in, making the scan not as successful, however I did overall ;ike this idea when looking at these first try results. I really like the idea of the hand, just need to be aware of where i am placing it, as like in the first image, it would of looked better on top, so it gives an illusion of getting something from the 'draw'.
24/06/2021
As I mentioned, after playing around with pairings on the 23rd, I wanted to play around with the image Zain and my mum's foot. I used photoshop to edit the image of Zain, and adjust the colour of the reflection in the sunglasses, to be more matched to the image I have of coffee, as I love those two images as a pairing. Then I flipped the image of my mum's foot and hand, so that it was opposite, creating a more interesting pairing.
As I mentioned, after playing around with pairings on the 23rd, I wanted to play around with the image Zain and my mum's foot. I used photoshop to edit the image of Zain, and adjust the colour of the reflection in the sunglasses, to be more matched to the image I have of coffee, as I love those two images as a pairing. Then I flipped the image of my mum's foot and hand, so that it was opposite, creating a more interesting pairing.

|
|
25/06/2021
I had a photography lesson today, and sir showed us some example photobooks of past students. One that stood out to me was called 'combining the journeys' by Holly Podina-Davies. She created a handmade book using the Japanese binding technique:
I had a photography lesson today, and sir showed us some example photobooks of past students. One that stood out to me was called 'combining the journeys' by Holly Podina-Davies. She created a handmade book using the Japanese binding technique:


|
This student utilised photographic paper to create glossy photos, which is just what I want for my photobook. As my images have intricacies and vibrant colours, I think they would appear better glossy and full-blown across the entire A4 page. An advantage of Japanese binding is the ability to use a larger amount of paper, allowing you to add more images into the photobook. I like that you can see the book's binding since it gives it a more vintage aspect, as books were once always bound by hand. The making process of the book is : |
|
|
I tried making a Japanese binded book myself. It was quite easy, and also quick, however something that I did struggle with was the thread, as it was quite thin, and therefore the knot was smaller than the punched holes in the paper. This proving that correct equipment is needed for best results, as usually thicker thread is used or even waxed thread. The threading pattern/ technique was very simple to follow and easy to understand and complete. |
making a Japanese binding book from Migle on Vimeo. |
26/07/2021
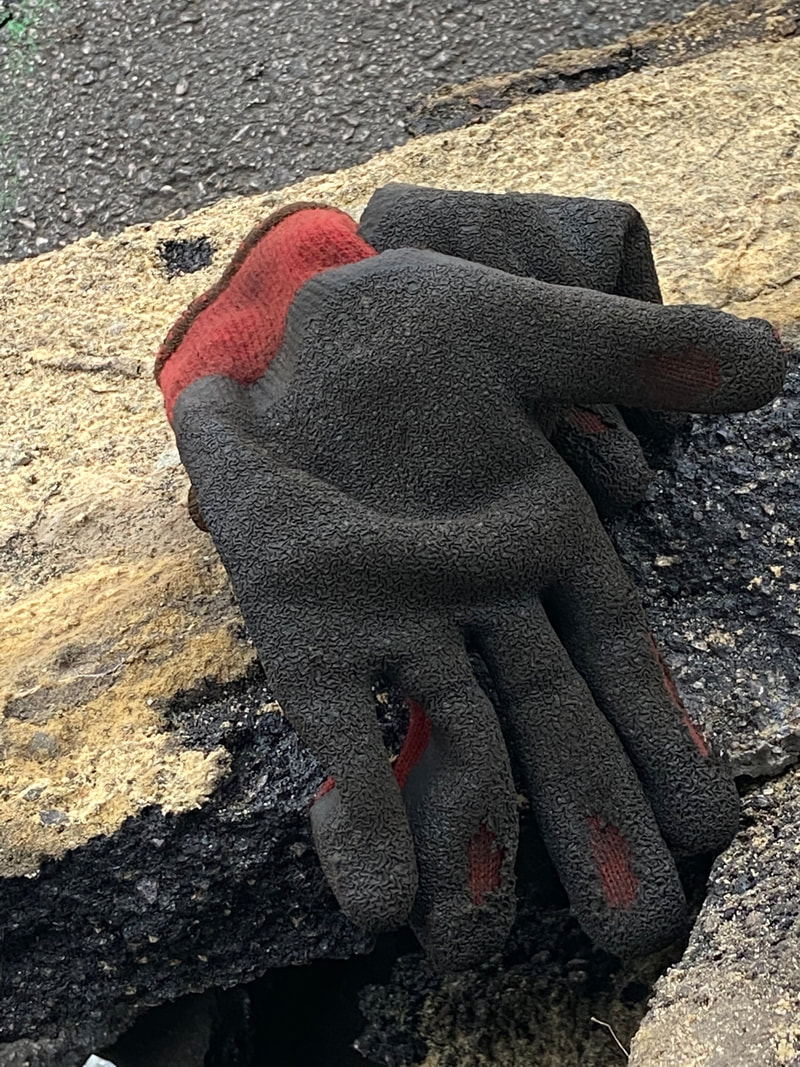
I took a few photos of my mum, because she was in the garden, doing some work in the garden, wearing these big red gloves. I thought I could capture a great picture, and so I just asked her to put her hands up to her face, as I envisioned a sort of peak through the fingers of the gloves, to my mum's face. I loved the very close image of my mum with the gloves, it turned out exactly how I wanted. I like how as an audience we are peaking through the gaps, and I thought it is a good representation of a window image, of an audience being revealed to a character. I also really like the bright red and how vibrant it looks against my mum's skin tone.
I took a few photos of my mum, because she was in the garden, doing some work in the garden, wearing these big red gloves. I thought I could capture a great picture, and so I just asked her to put her hands up to her face, as I envisioned a sort of peak through the fingers of the gloves, to my mum's face. I loved the very close image of my mum with the gloves, it turned out exactly how I wanted. I like how as an audience we are peaking through the gaps, and I thought it is a good representation of a window image, of an audience being revealed to a character. I also really like the bright red and how vibrant it looks against my mum's skin tone.


01/07/2021
Today, I brought some photographic paper, to realise it was not double-sided gloss, therefore not all my images would be glossy. Moreover, I also do not have the correct printer, to be able to print the images on photographic paper. Therefore, I spoke to my teacher for advice and I have decided to create my photobook on bookwright, making it online, as it is more likely to work, with all of my preferences. My main features were for my book to have glossy photos, and full bleed, which is more practical than using an online bookwright.
Today, I brought some photographic paper, to realise it was not double-sided gloss, therefore not all my images would be glossy. Moreover, I also do not have the correct printer, to be able to print the images on photographic paper. Therefore, I spoke to my teacher for advice and I have decided to create my photobook on bookwright, making it online, as it is more likely to work, with all of my preferences. My main features were for my book to have glossy photos, and full bleed, which is more practical than using an online bookwright.
|
I also took a few more pictures, as I felt like I wanted a few more for my selection. I took images of my friend in a washing machine. I was inspired by this idea by an image I saw on Pinterest. I thought it was so unique and creative. I used this idea with my style of photography, but adding apples into the washing machine, as a basis of my photobook images is to arise speculations. My images have a run-through of bright colours, and I made sure to carry this through, in these photos, with coloured clothes. I made the images give the illusion of my friend falling out of the washing machine. |

|


I am not a huge fan of the images of Alicia in the green, as i felt they did not match the atmosphere of my photobook well, as those images are more creepy and sort of reminded me of like psychosis. I also needed to edit the ones i did like, which were mainly the ones with the washing machine, using photoshop, as I was not fully happy with the colours and lighting. After editing the images, i really liked them as the ones with the washing machine, turned out how i envisioned them, colourful, questionable and quirky.


02/07/2021
The first thing I did today, looked at the images I wanted to use and try to find pairings. This took a couple of times, as when you look at the images, again and again, each time you realise something new. My pairings were mostly based on some less obvious comparisons, that would take looking at both images, to find connections between them. My favourite pairing from the first set was the one of Alicia falling out of the washing machine and Zain against the blue sky. I paired them together because once levelled correctly, the body of Alicia will aline with Zain's lower body. Also, Zain's arm and Alicia's leg match in terms of being brought up but bending in opposite directions. There were some images that I could not find a suitable pairing for and therefore had left it and I came back a tried to look for new/more pairings.


This was the second time I looked at my set of images, in hope to think more about my pairings. Whilst doing this, I even found images that I decided to extract, for example the image of my mum's hand and foot.


I then began putting my images into book wright, sequencing where each pairing would go. This process resulted in a few extractions of images, and replacing with new images, as I realised I had quite a few images that were better than some chosen ones.


These were the images that I decided to include into my sequence of photos. With this change of images, came a sort of new narrative as my mum was a re-occuring character in my images. However, my images still followed the questionable, random atmosphere of a mix of humorous and mysterious images. As I had an image with the text 'Ample living space' , I e-considered for that to be the title, as it would make complete sense once the audience find the image.

To me the title sounds more sophisticated, which creates a contrast between the title and the images in the photo-book, which I personally like. Also, I think it connects well as to me the title represents the idea of a large living space, representing my original idea of a 'junk draw', a place for this group of images to live. Therefore my books narrative is the idea of a group of images with no specific narrative, except this re-occuring character (my mum) which is connecting the images together.
Once I received my photobook in the post, I flicked through, and was so pleased with it. However there were some things that i would of changed. When receiving the photobook, I was expecting for the images to be on glossy paper, to really intensify the colour and vibrancy of my images, however they were not. I still am very happy with my photobook, but if I were to re-make it, I would print with glossy finish paper. However, the book is full of colour and humour, which was exactly what i wanted my photobook to be. I am very happy with my selection of images and how I have paired them, and the random selection of images, do aid into the idea of a junk draw of images, which is what i was hoping for all along. I also like the cover image of my photobook because it greets the audience with a vibrant image, and also the main subject of my book (my mum), already giving a slight preview of my photobook from the very beginning.
